Most gardeners struggle with dense, poorly draining clay soil. You can transform your garden from a muddy mess to a flourishing paradise. You’ll learn effective methods to break up compacted clay and improve aeration, leading to healthier plant growth and bountiful harvests.
Identifying Key Clay Soil Factors
Understanding your soil’s unique characteristics is the first step toward effective remediation. You must identify key factors like soil texture, drainage, and compaction. * Heavy clay often feels sticky when wet and forms a hard clod when dry. * Poor drainage leads to standing water and root rot. * Compacted soil restricts root growth and air circulation. Recognizing these signs helps you choose the right solutions.
Testing Density and Drainage Rates
You can easily assess your soil’s density and drainage by performing simple tests. Dig a small hole, fill it with water, and observe how quickly it drains. A slow drainage rate confirms poor permeability, a hallmark of dense clay.
Analyzing Mineral and Nutrient Composition
A comprehensive soil test reveals your clay’s mineral content and nutrient levels. This analysis identifies deficiencies or excesses that directly impact plant health. Knowing your soil’s composition guides targeted amendments. A detailed analysis of your clay soil’s mineral and nutrient composition provides specific insights into its limitations and potential. You will discover the exact proportions of elements like calcium, magnesium, potassium, and phosphorus. High levels of certain minerals, such as sodium, can be particularly detrimental, leading to salinity issues and further hindering water infiltration. Conversely, a lack of important micronutrients can stunt plant growth and reduce overall garden productivity. This precise data allows you to select specific organic matter or soil conditioners to correct imbalances, rather than relying on generic solutions.
How-to Aerate Compacted Soil Quickly
Aerating compacted clay soil makes a significant difference in its structure and drainage. You improve root access to water and nutrients, directly contributing to healthier plants. Ignoring this step will severely limit your garden’s potential, so make aeration a priority for any clay soil improvement project.
Mechanical Core Aeration Methods
Using a core aerator pulls small plugs of soil from your lawn, creating channels for air and water. You can rent these machines or hire a professional service for larger areas. Be sure to aerate when the soil is moist, but not waterlogged, for optimal plug removal.
Strategic Liquid Aeration Applications
Applying liquid aeration products can soften compacted clay without the physical effort of mechanical aeration. These solutions contain soil conditioners that break down clay particles, improving porosity. You simply spray the product onto your lawn, allowing it to penetrate and work its magic. These liquid solutions often contain humic acids, fulvic acids, and other organic compounds that act as natural chelators and flocculants. You will find these ingredients help to bind small clay particles into larger aggregates, creating more space for air and water. You might also notice an improvement in microbial activity, which further enhances soil structure over time.
Amending the Soil Structure
Improving your clay soil’s structure is a cornerstone of long-term success. You will transform dense, compacted earth into a thriving environment for roots and beneficial organisms. This transformation requires a multi-pronged approach, focusing on breaking up existing compaction and introducing materials that encourage aeration and drainage.
Incorporating High-Quality Organic Matter
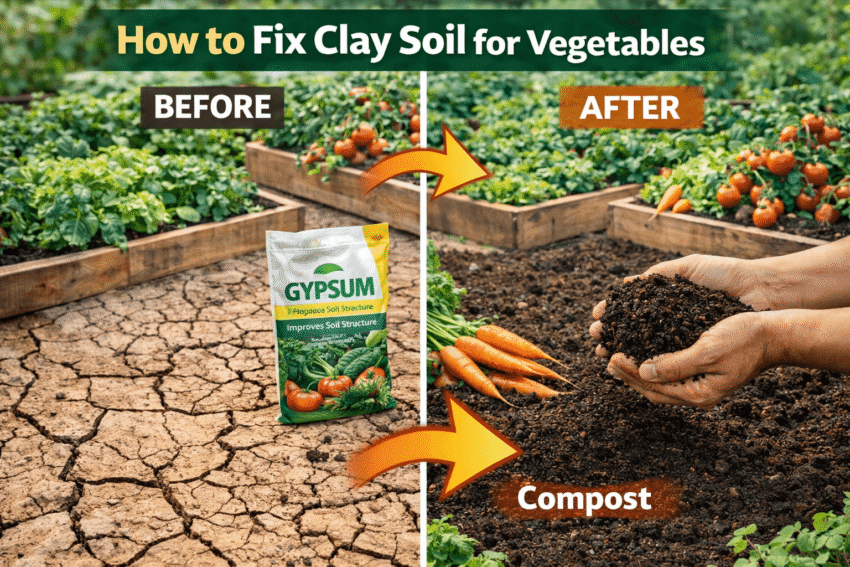
Mixing in compost, aged manure, or leaf mold dramatically improves clay soil. These materials create larger pore spaces, allowing air and water to penetrate while releasing imperative nutrients for plant growth. Regular applications are key to maintaining this improved structure.
Using Gypsum to Flocculate Clay Particles
Applying gypsum (calcium sulfate) can effectively improve soil aggregation in some clay soils. Gypsum’s calcium ions displace sodium, causing clay particles to clump together, which creates larger pore spaces for better drainage and aeration. This method is particularly beneficial in sodic clay soils. Gypsum works by introducing calcium ions into the soil, which have a positive charge. These calcium ions attract and bind to the negatively charged clay particles, causing them to flocculate, or clump together. This clumping action effectively creates a more open, granular structure within the soil, allowing water to drain more freely and air to circulate. Always conduct a soil test before applying gypsum to ensure your soil type will benefit and to determine the correct application rate. Over-application can lead to nutrient imbalances, so precision is important.
Expert Tips for Preventing Re-Compaction
Preventing soil re-compaction is key to maintaining your improved clay soil. You must adopt practices that protect the soil structure you’ve worked hard to create. Avoid walking on wet soil. Add organic matter regularly. Use appropriate tools. Any further compaction will undo your efforts.
Implementing No-Till Gardening Practices
Adopting no-till gardening greatly reduces soil disturbance. You protect the delicate soil structure and beneficial microbes by not tilling. This method naturally improves drainage and aeration over time. Any digging should be minimal.
Utilizing Permanent Pathways and Mulching
Establishing permanent pathways keeps foot traffic off your planting beds. You can prevent compression of the soil in active growing areas. Applying a thick layer of mulch also protects the soil surface. Any exposed soil is vulnerable. Creating designated pathways, constructed from materials like wood chips, gravel, or even stepping stones, ensures you walk only in specific zones. This strategy focuses compaction to these non-growing areas, preserving the fluffy, well-aerated soil in your garden beds. A generous layer of organic mulch, such as straw or shredded leaves, protects the soil from the impact of rain, helps regulate soil temperature, and slowly breaks down to feed the soil with continuous organic matter. This continuous input of organic material is particularly beneficial for clay soils, as it continually improves their structure and prevents them from compacting again.
Managing Moisture and Irrigation
Handling water correctly is vital for clay soil. You must prevent both waterlogging and excessive drying, as both extremes damage soil structure and plant health. Proper irrigation techniques ensure your amended clay soil remains friable and supports vigorous growth.
Establishing Slow-Drip Watering Systems
Installing slow-drip systems provides a controlled, consistent water delivery directly to plant roots. This method minimizes runoff and deep water penetration, preventing the compacted layers often associated with overhead watering on clay. Your plants receive just the right amount.
Improving Surface Runoff and Grading
Correcting surface runoff and grading prevents water from pooling in low spots, which causes anaerobic conditions and root rot. You can gently slope the soil away from foundations and planting beds, directing excess water to appropriate drainage areas. Proper grading around your garden beds and structures significantly impacts how clay soil manages moisture. You will want to create a slight incline, perhaps 1-2% grade, away from sensitive areas. This gentle slope encourages rainwater and irrigation water to move slowly across the surface rather than sitting and saturating the clay. Consider installing swales or rain gardens in lower areas to capture and slowly absorb this runoff, further preventing erosion and benefiting groundwater recharge.
Selecting Plants to Improve Soil Quality
Selecting the right plants can significantly improve your clay soil over time. You are necessaryly partnering with nature to break up compaction and add organic matter. This strategy offers a sustainable, long-term solution for better drainage and aeration, making your garden much more productive and enjoyable.
Utilizing Deep-Taproot Cover Crops
Planting deep-taproot cover crops is an excellent initial step. Their powerful roots penetrate and loosen dense clay, creating channels for water and air. You will find that crops like daikon radish or sweet clover are particularly effective at this natural soil amendment, improving structure below the surface.
Choosing Native Clay-Hardy Species
Opting for native clay-hardy species ensures your plants will thrive in challenging conditions. These plants are naturally adapted to local soil types, requiring less intervention from you. You will also discover they often need less water and fertilizer, promoting a more self-sustaining garden ecosystem. Native clay-hardy species offer a sustainable and low-maintenance solution for clay soil. Your local nursery or extension office can provide lists of plants specifically adapted to your region’s climate and soil. You will find that these plants, having evolved in similar conditions, possess the inherent ability to tolerate poor drainage and compaction. They develop root systems that can penetrate and further improve the soil structure over time, without you needing to amend the soil heavily beforehand. This approach not only benefits your soil but also supports local biodiversity, creating a more resilient and beautiful garden.
Final Words
On the whole, you have many effective options for improving clay soil. You can break up compaction with gypsum and organic matter, then boost drainage and aeration. Regular additions of compost and other amendments will keep your soil healthy and productive. Your efforts will result in a thriving garden, making the initial work well worth it.
FAQ
Q: How can I improve clay soil quickly for immediate planting needs?
A: Amending clay soil for immediate planting requires specific actions. Incorporate organic matter such as compost, well-rotted manure, or leaf mold into the top 6-12 inches of soil. This helps break up the dense structure of clay, improving aeration and drainage. Gypsum can also be applied, but its effectiveness varies depending on the specific clay type and soil chemistry; a soil test can determine if gypsum will be beneficial. For very immediate needs, creating raised beds filled with a suitable soil mix (a blend of topsoil, compost, and sand) provides an instant planting solution while you work on improving the native clay soil over time.
Q: What are the best organic materials to use for long-term clay soil improvement?
A: Organic materials are highly effective for long-term clay soil improvement. Finished compost, mushroom compost, and aged wood chips consistently improve soil structure. These materials add humus, which binds clay particles into aggregates, creating pore spaces for air and water. Green manure crops, also known as cover crops, offer another excellent solution. Planting crops like clover, vetch, or rye, then tilling them into the soil before they go to seed, adds a significant amount of organic matter and improves soil tilth over several seasons. Repeated applications of these organic amendments will transform heavy clay into a more workable and fertile soil.
Q: Is it possible to fix clay soil without digging or tilling?
A: Yes, you can improve clay soil without extensive digging or tilling, though it takes more time. Top-dressing with organic matter is a key no-dig strategy. Spread a 2-4 inch layer of compost, leaf mold, or aged wood chips directly onto the soil surface each year. Earthworms and other soil organisms will gradually pull this organic material down into the clay, improving its structure from the top down. Planting deep-rooted cover crops and allowing them to decompose in place also helps break up compacted clay. This method respects the soil’s natural structure and supports a healthy soil food web.
Q: What are common mistakes people make when trying to fix clay soil?
A: Several common mistakes can hinder efforts to fix clay soil. One frequent error involves adding too much sand without sufficient organic matter. Sand, when mixed with clay without enough organic buffer, can create a concrete-like substance, making the problem worse. Another mistake is working clay soil when it is too wet; this compacts the soil further, destroying any existing structure and creating hard clods. Over-tilling can also be detrimental, as it disrupts the soil food web and can lead to a loss of organic matter over time. Not conducting a soil test before making amendments is another oversight, as it prevents targeted and effective treatment.
Q: How does a soil test help in fixing clay soil, and what information should I look for?
A: A soil test provides specific data necessary for fixing clay soil effectively. The test results will indicate the soil’s pH level, which influences nutrient availability. Clay soils can sometimes be acidic or alkaline, and understanding the pH helps determine if amendments like lime or sulfur are needed. The test also measures existing nutrient levels (nitrogen, phosphorus, potassium, and micronutrients), allowing you to apply only what is necessary. Importantly, a soil test can sometimes provide an indication of soil texture, confirming the presence of heavy clay. This information guides you in selecting the most appropriate organic amendments and determining application rates, ensuring your efforts are targeted and efficient.